
Connecting to the truck
The grooming service batteries are connected to the vehicle's electrical system to take advantage of charging from the vehicle's alternator. Details of that are discussed in detail on pages for the Pathmaker switch that automatically dis/connects the two 12 volt systems, and the XAR regulator that manages charging voltage from the vehicle to the service batteries.
Here are some details of the physical connection of the two systems.
Heavy wire, 4/0 gauge, runs from the service batteries in the rear to the vehicle battery area under the hood. It was lots of fun running this heavy wire under the vehicle and through the chassis rails. two runs were made, rather than use the chassis as the ground leg. The positive lead was run through metallic, liquid-tight, flexible conduit.
These were run through chassis rails where possible, and secured to the chassis with stainless steel band clamps at other locations. At the rear, the cables route up through the floor and are cut fairly short and extended with more flexible cables made from welding cable. I didn't think of using welding cable for the entire run, but it would have simplified the terminations. The 4/0 wire I used is the 19 strand, THHN, variety used in building construction. The insulation on this wire is thinner, with a smooth surface and higher temperature rating than the welding cable. The insulation on welding cable is softer and more flexible, and there are many, many more smaller strands. This may be an issue, since the runs along the chassis come close to the exhaust system in places.
At these points, I fabricated heat shields to protect the wiring. The shields are two layers of aluminum wrapped over the chassis and wires, along with some other cables and hoses for the water heater to engine connection. At two points I added heat resistant material between the layers of aluminum. This material is a fabric intended for plumbers' use to protect an area near where a torch is being used.
At the front end, the negative lead connects directly to the battery. The positive lead connects to a 150 Amp breaker to protect the run. Below are some pictures of the vehicle terminations as seen looking down over the battery. The white surface is the top of the front, right fender. The stiff cable is again connected to flexible jumper cables that connect to the battery and breaker.
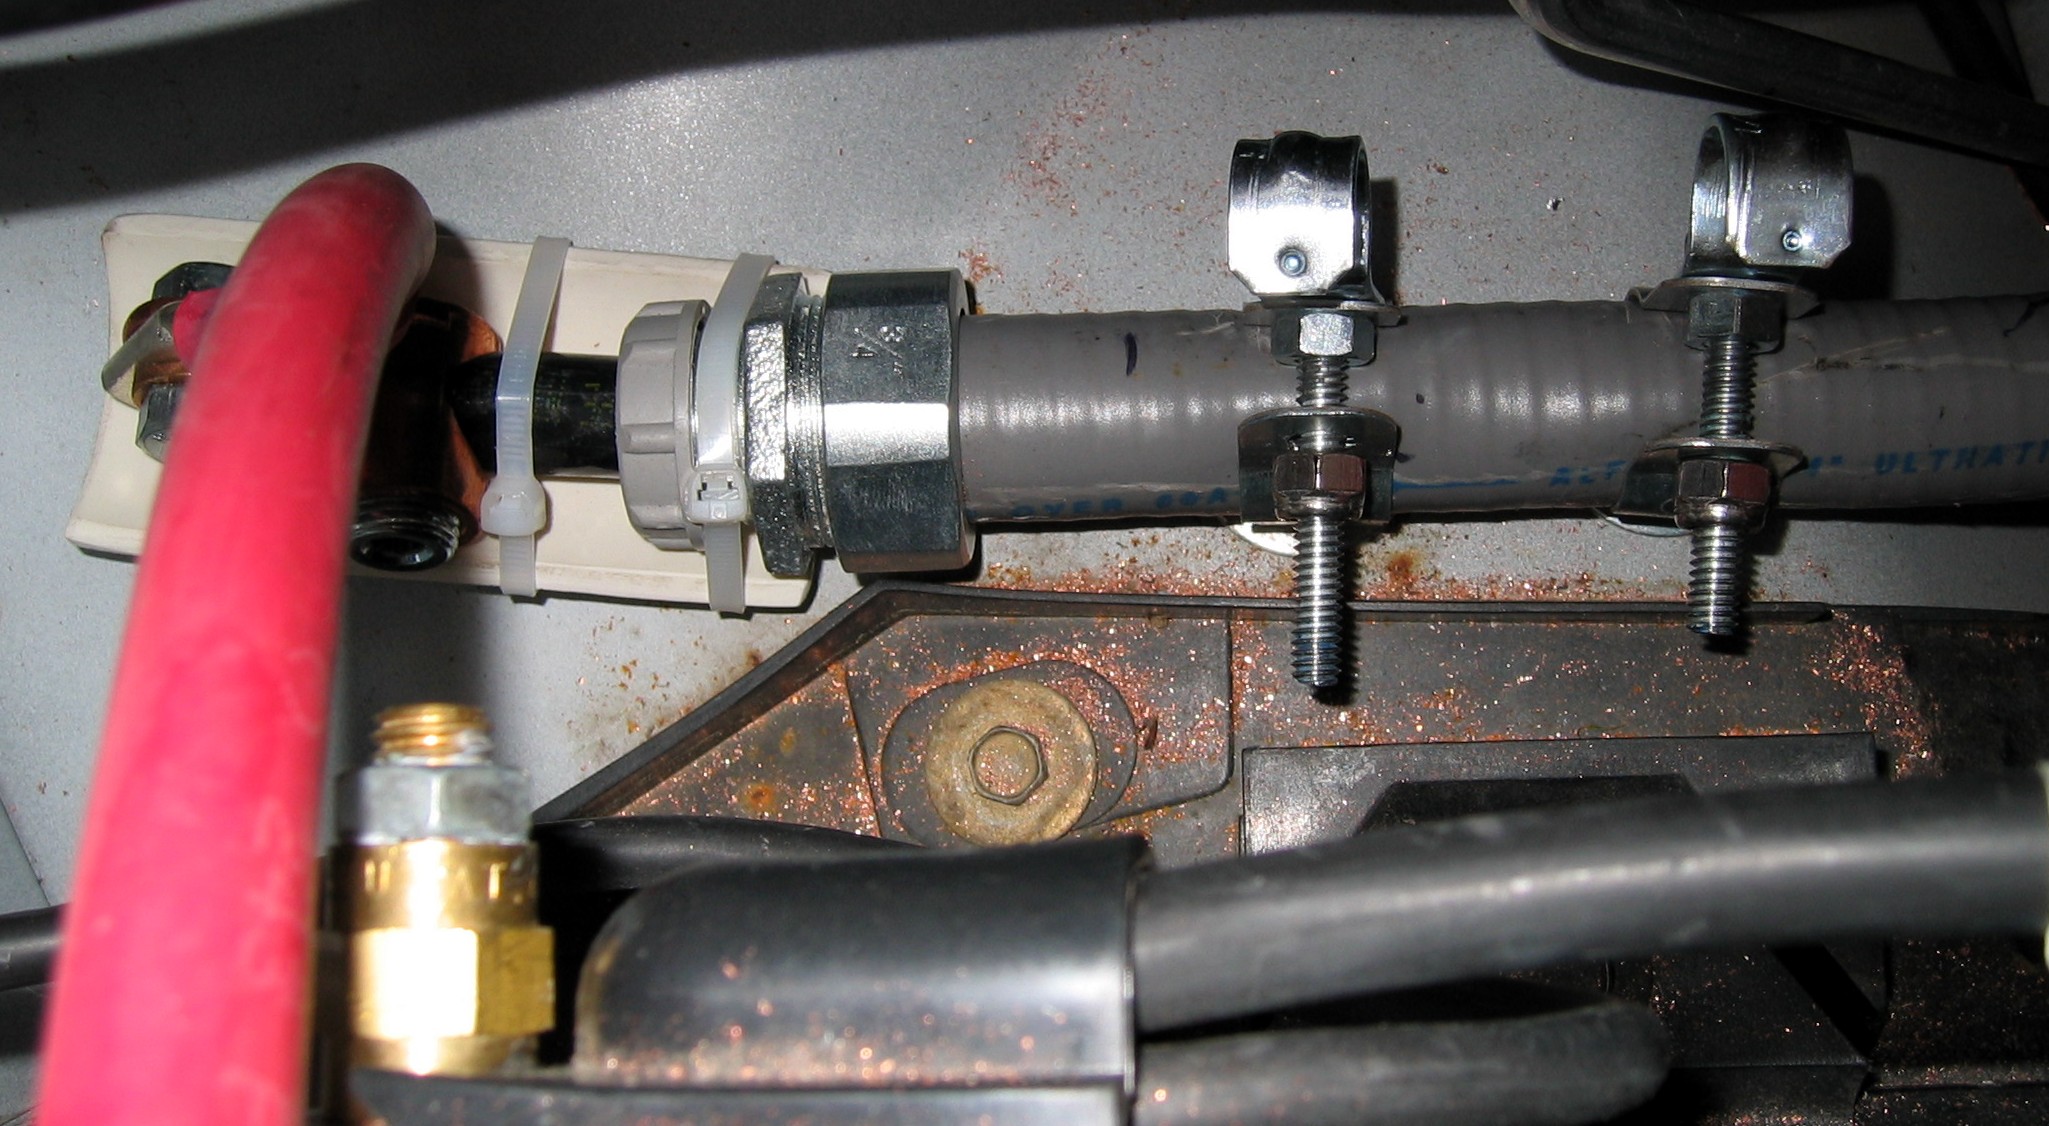 |
This shows the positive connection. The liquid-tight conduit is secured with two standard conduit hangers. Extended vertically from the bolts that tighten the hangers are 1/2" one hole straps. These are used to secure the negative leg. |
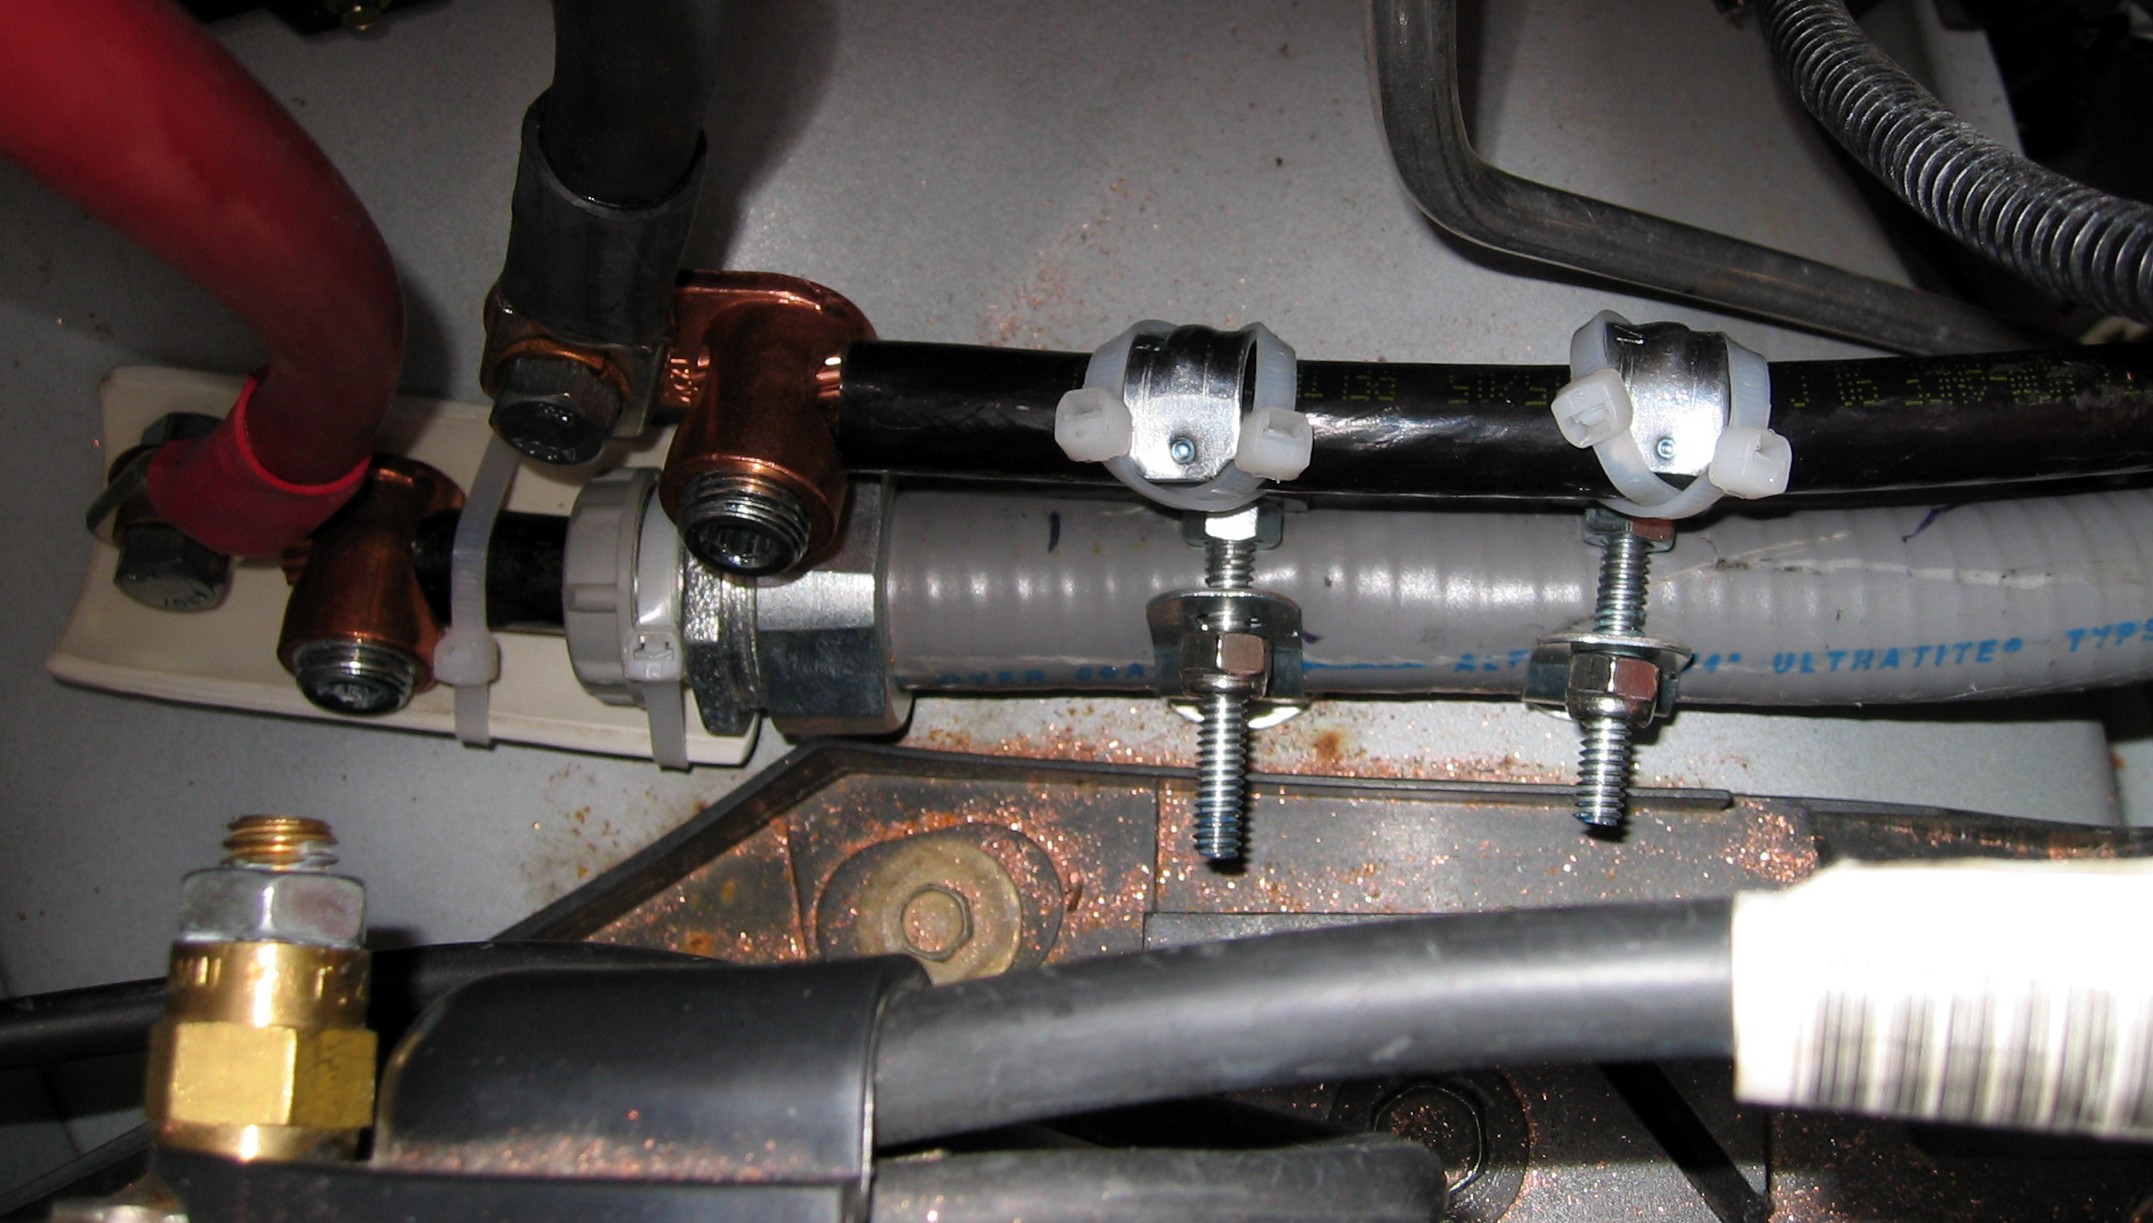 |
Here the negative line is secured in the one hole straps over the positive line below. |