The little blue flame...
LP Gas powers the furnace, water heaters and the refrigerator. The water heaters and fridge can also use electricity when the generator is running. The water heaters also use engine heat. The selection of the LP gas tank was a marginally cooperative effort on the part of the body provider, Supreme Industries. I asked for the largest tank that could be placed under the body.
Placement
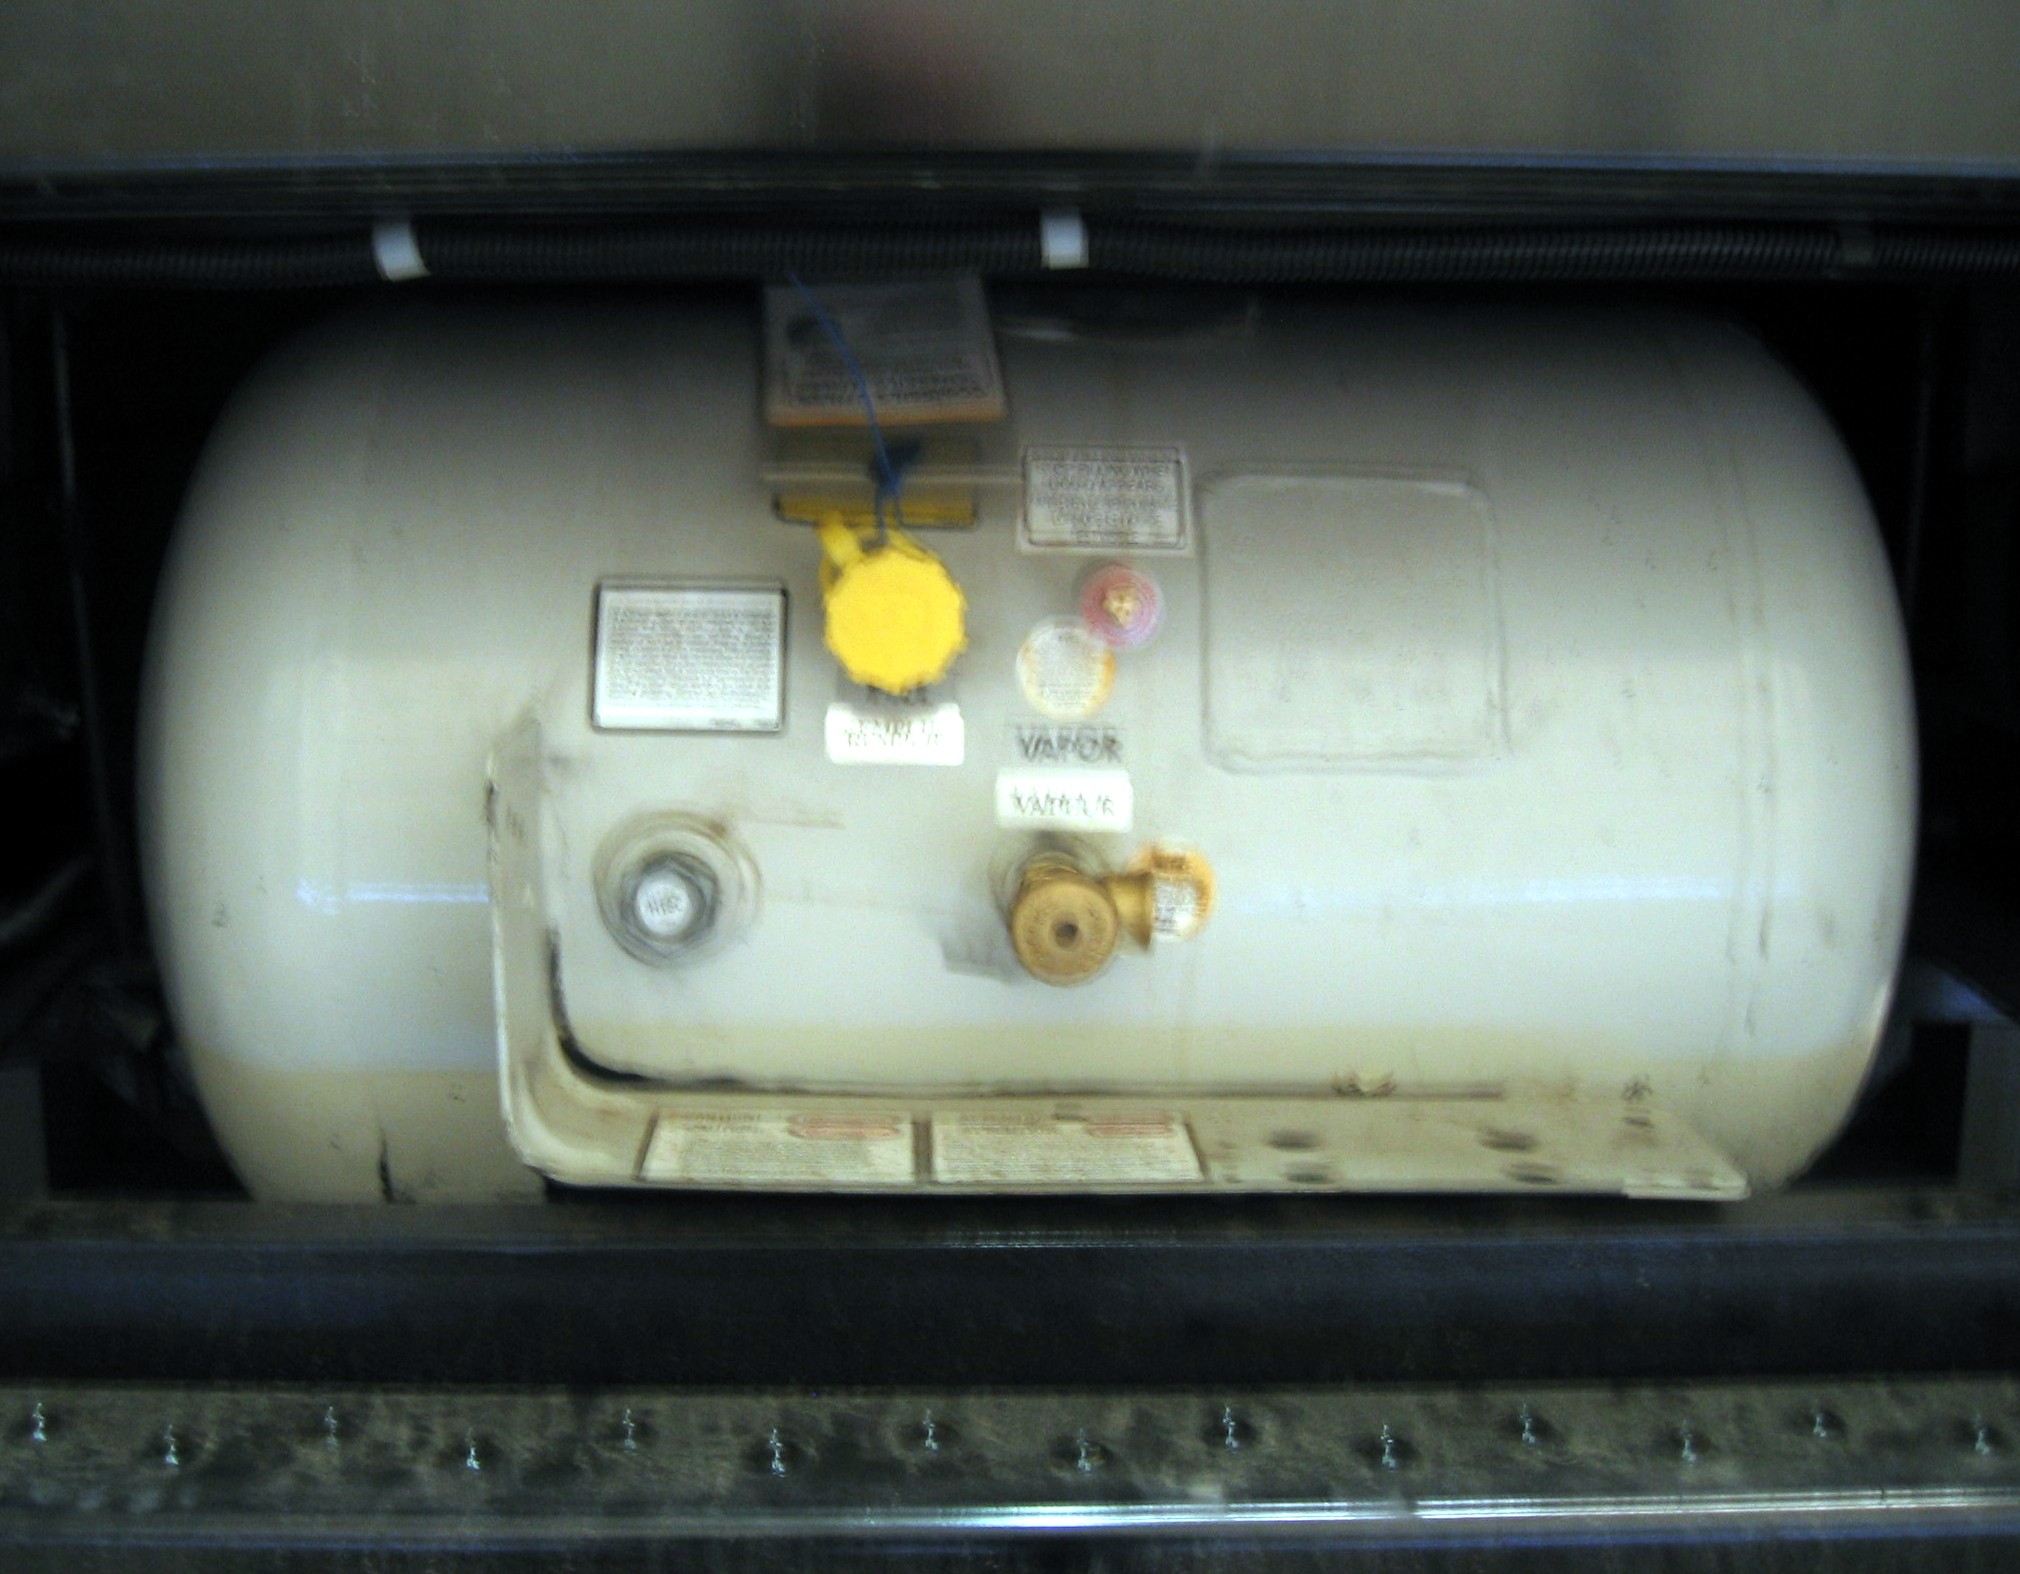
We ended up with a tank mounted at the rear, between the chassis rails. After seeing the vehicle, it was clear a larger tank could have been mounted on the side, at the rear, in place of one of the toolboxes. My original thought was to mount the tank inside the equipment area, well above bumper height. As it turned out, it is bad practice to place the tank in the same space with any of the appliances, so the tank went down, and the batteries came up. The tank would not have been as secure mounted on the side, with no substantial protection from impact. Currently the tank is nestled between the chassis rails, with twelve inches of steel tubing protecting it in the rear bumper. The picture below is a tight shot of the rear of the vehicle as it arrive from the factory, prior to fabrication of the rear step bumper.
Manchester Tank Catalog Model 68148 Diagram
Regulation
The system requires a regulator to control gas flow from the tank. This was an "off the shelf" purchase at the RV dealer. Marshall Brass seems to be the dominant supplier of gas fittings, valves, etc. I chose their two stage regulator, allegedly better for systems with multiple appliances. The regulator connects directly to the tank, as shown in the photo below. The rectangular block of wood behind the silver regulator is for support of the valve.
Insert Picture
Emergency Shutoff
Immediately after the regulator is a solenoid operated valve connected to a LP gas detector. Details on the detector...
Piping
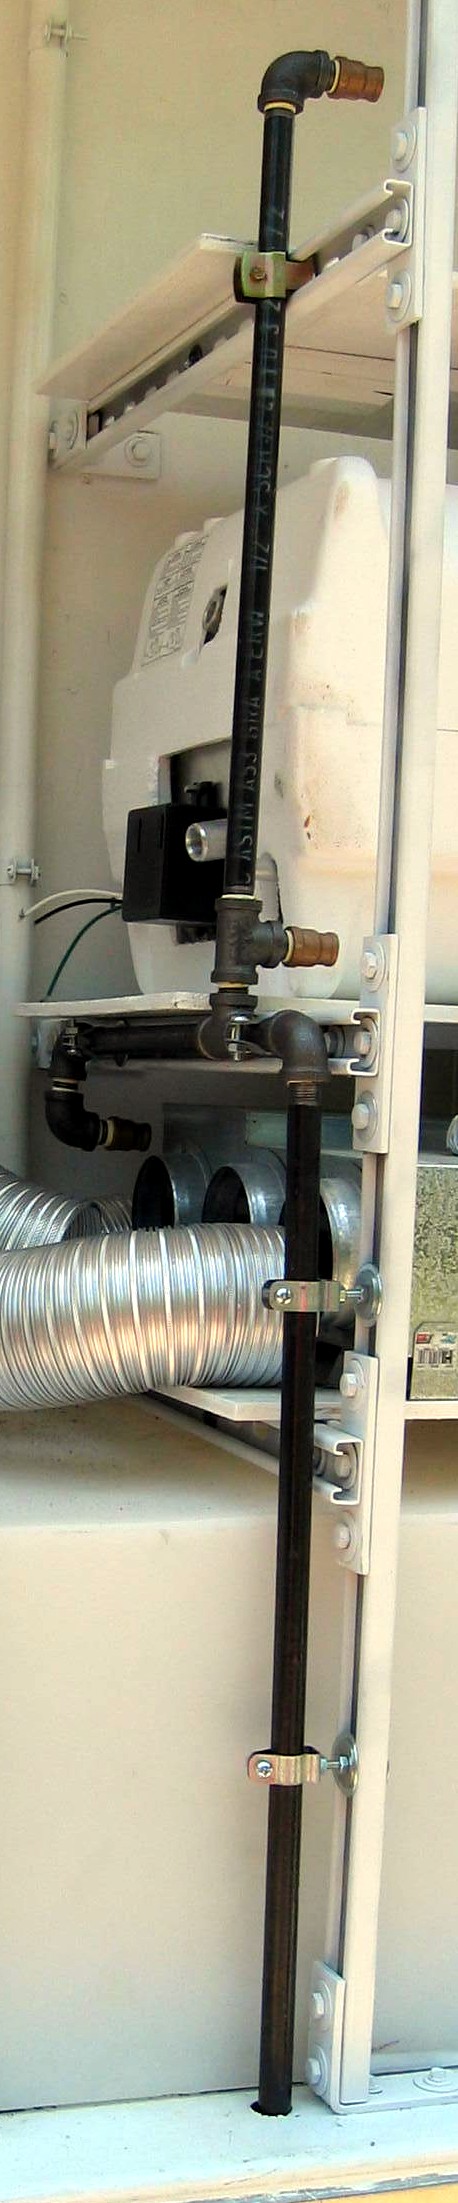
I thought it might be easy to buy some off the shelf hoses, ready made with fittings, and just hook everything together. I contacted a local LP gas provider to ask if they might make the hoses to length for a neater installation. They said they didn't want anything to do with outfitting a vehicle, and politely, but firmly, cautioned me against using hoses for the undercarriage area and any body penetrations, because the hoses might wear and leak.
I took their advice and embarked on a piping project. It was a bit tricky working in the channel under the rear door, around the tail lights and down to the tank, but it worked out. I made several trips to the local hardware store, the old fashioned kind where they still cut pipe to length and thread it for you. The pictures below show the piping above the floor level, following the strut supports up to the appliances. From the last piped fitting, for each outlet, a flexible hose will connect the appliance.
This shows the pipe run coming up through the floor and feeding the two water heaters and furnace. The furnace is the lower unit. Only the lower water heater is in place for this photo.
There is also a run of pipe below the floor, going forward, to serve the refrigerator. This follows a chassis rail, loops under it and up, through the toolbox and through the floor and into the refrigerator cabinet. No pictures for this piece, but it was challenge. The last few feet, within the cabinet is run with flexible 3/8" copper tubing.