Too much?
Even before living with the version 1 vehicle, a retractable hose was identified as a requirement. There aren't a lot of off-the-shelf options here. Hannay Reels is the granddaddy of reel manufacturers. They have a lot of standard products, but everything is made to order. An electric powered unit would have been nice, but was out of the budget. We ended up with a spring-powered unit. The reel was made 30" in diameter to allow rewinding, inside the vehicle, without supervision. The unit was fairly expensive, about $700. It is industrial quality, and heavy, about 120 pounds with no hose.
The reel will hold 90 feet of 1/2" hose. Pulling the hose out winds a spring that will retract the hose when done. Pulling tension is proportional to the amount of hose extended. The nice thing here is that the hose is stored in the equipment compartment and protected from freezing in the winter. No more bringing the hose into the house during the winter. It still may be necessary to run the hose into the house and connect to an inside faucet during the coldest weather. The truck is weather proof, but our outside faucets are not.
Mounting
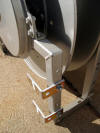
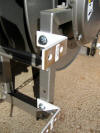
Since the rule of thumb for mounting in a vehicle is design for three times the static weight of the object, the mouting should be good for 300 - 400 pounds. The installation uses eight right-angle uni-strut brackets, and two reinforced right-angle supports on the bottom. All are fastened with 1/4" lag screws.
The pictures below are thumbnails. Click to enlarge


